

Escape to Paradise: 10 Hidden Gems in Bali Every Travel Photographer Must Visit
Bali, an island of shimmering beaches, volcanic landscapes, emerald rice terraces, and vibrant cultural traditions, has long been a magnet for photographers... Read More
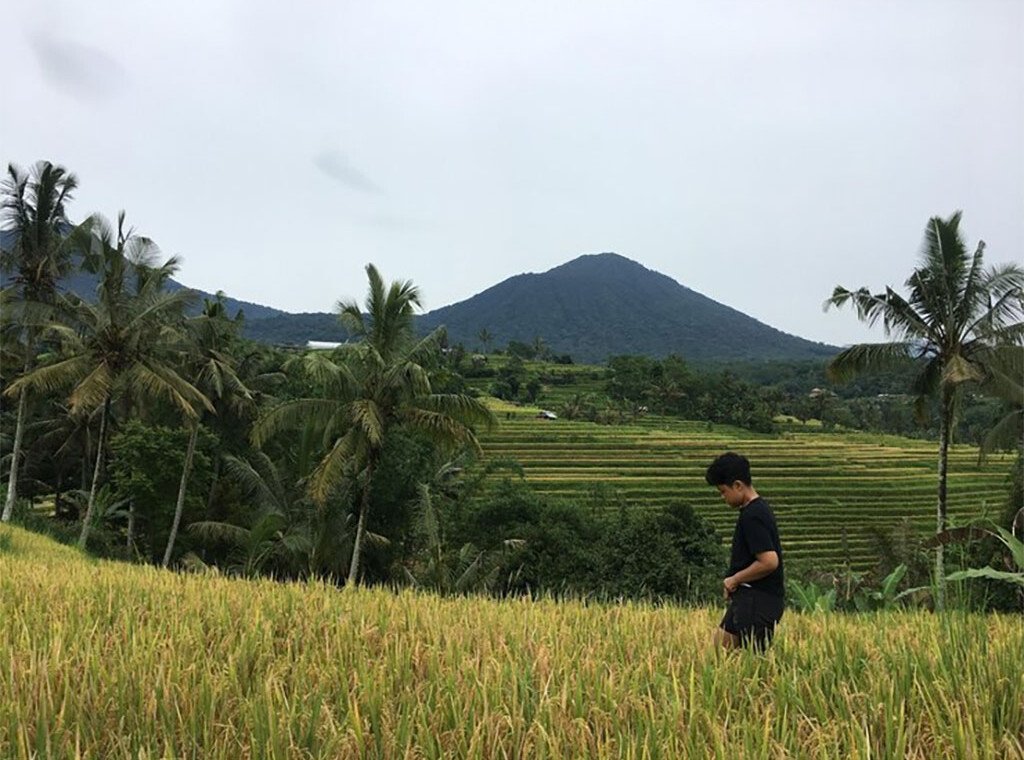
Ubud, Bali, is renowned for its lush landscapes, rich culture, and serene atmosphere. Among its most iconic features are the stunning rice terraces that cascade down the hillsides, offering photographers a paradise of natural beauty and cultural heritage. In this comprehensive guide, we’ll explore the best techniques, times, and locations to capture the essence of Ubud’s rice terraces.
Ubud’s rice terraces are more than just picturesque landscapes; they are a testament to Bali’s rich agricultural heritage. The terraces are part of the Subak irrigation system, a UNESCO World Heritage site that dates back to the 9th century. This traditional system not only manages water distribution but also embodies the Balinese philosophy of Tri Hita Karana, which emphasizes harmony between humans, nature, and the divine .
The terraces are typically planted with rice twice a year, during the wet and dry seasons. The wet season, from October to April, brings vibrant green hues to the fields, while the dry season, from May to September, offers golden tones as the rice ripens. Understanding these cycles is crucial for photographers seeking to capture the terraces at their most photogenic.
Timing is everything in photography, and the rice terraces are no exception. The best times to capture the terraces are:
Avoid midday hours (11:00 AM – 2:00 PM) when the sun is directly overhead, creating harsh shadows and overexposed highlights.
To capture the beauty of Ubud’s rice terraces, consider bringing the following equipment:
While the entire region of Ubud offers stunning rice terraces, certain locations stand out for their accessibility and photographic potential:
To make the most of your photography sessions, consider the following tips:
When photographing Ubud’s rice terraces, it’s essential to respect local customs and traditions:
Photographing Ubud’s stunning rice terraces offers an opportunity to capture the natural beauty and cultural heritage of Bali. By understanding the best times to visit, equipping yourself with the right gear, and respecting local customs, you can create compelling images that showcase the essence of this enchanting destination.
The best time to photograph the rice terraces is during the wet season (October to April) when the fields are lush and green, or just before harvest (around June or September) when the terraces turn golden. Each season offers a unique aesthetic for photographers.
Early morning (around 6:00–7:00 AM) and late afternoon (4:00–5:30 PM) are ideal due to the soft, golden lighting. These times also help avoid harsh shadows and strong overhead sunlight common at midday.
No. While a DSLR or mirrorless camera provides the most control, modern smartphones with high-quality cameras can also capture stunning photos, especially when combined with good lighting and composition techniques.
Drones are generally allowed in most areas like Tegallalang and Jatiluwih, but you should always check local regulations and fly responsibly—avoid flying over people, temples, or private property without permission.
Some terraces, like Tegallalang, may charge a small entrance or donation fee to maintain the area. Others, like Jatiluwih, have a ticketed entrance as part of their status as a UNESCO World Heritage site.
Yes, many tour companies offer photography-focused tours that take you to the best viewpoints at optimal times. Hiring a guide can provide local insights and access to less touristy spots.
Generally, yes. The paths can be uneven or muddy, especially after rain, so wear sturdy shoes and be mindful of where you step. Keep gear secured and avoid carrying too much to maintain mobility.
Yes, but always be respectful and ask for permission first. Many locals are friendly and open to being photographed if approached politely.
Enhancing greens, contrast, and clarity often works well. Using tools like Lightroom or Snapseed can help bring out the texture and depth of your shots without over-processing.
A polarizing filter is highly recommended to cut glare and enhance color contrast, especially when shooting under strong sunlight. ND (Neutral Density) filters can also help with long exposures.
Bali, an island of shimmering beaches, volcanic landscapes, emerald rice terraces, and vibrant cultural traditions, has long been a magnet for photographers... Read More
Bali is a dream come true for photographers and content creators. Tropical vibes, jaw‑dropping sunsets, lush rice terraces, ancient temples, hidden waterfalls…... Read More
Bali it’s a place of mystique, spirituality, natural grandeur, and vibrant culture. Yet even seasoned travelers often gasp in astonishment when they... Read More


Join The Discussion